Add liquidity
This document explains how to create a new liquidity pool or add liquidity to an existing one.
Prerequisites
Set up or connect your wallet to Veax.
Before you start, review the reference information or look up attribute descriptions at each step.
Add liquidity
Choose the pool you want to deposit your liquidity to. You can do this in one of the following ways:
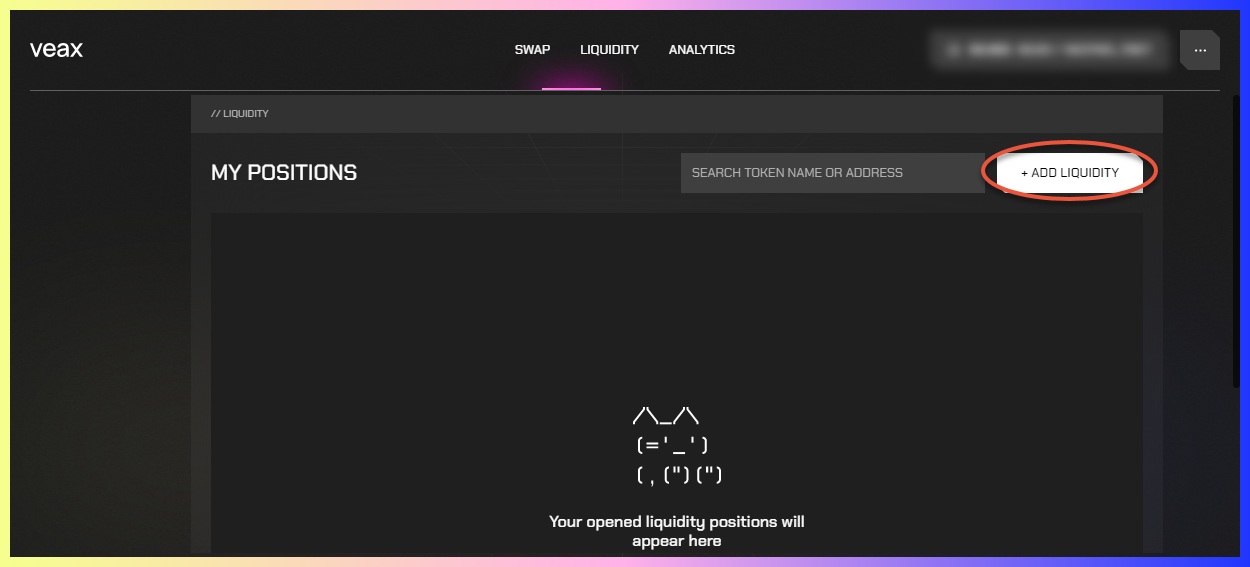
Through the //LIQUIDITY window:
Go to LIQUIDITY.
In the //LIQUIDITY window that opens, click + ADD LIQUIDITY.
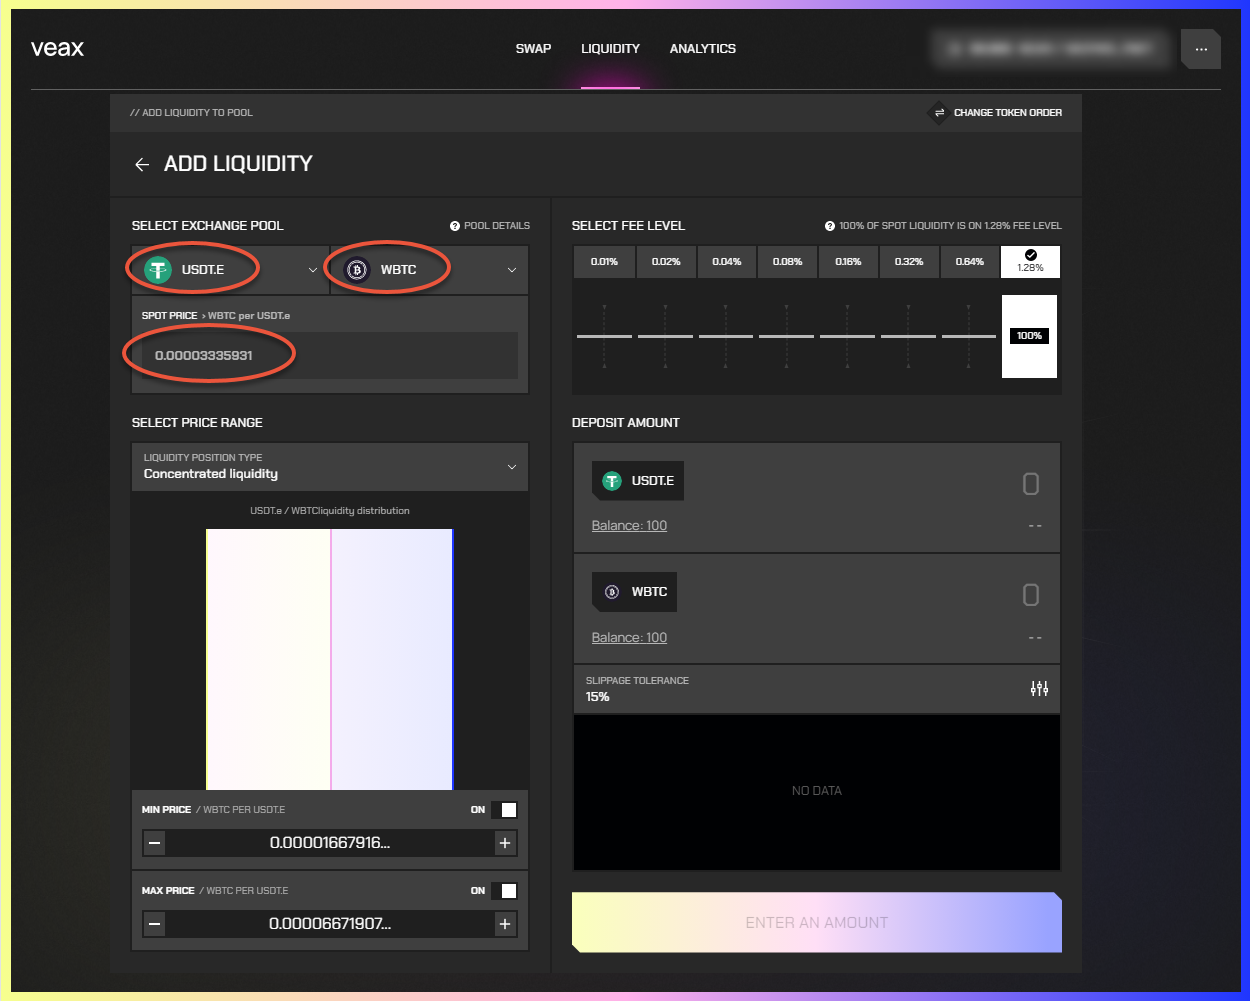
In the //ADD LIQUIDITY TO POOL window that opens, in the SELECT EXCHANGE POOL section, choose two tokens to select a pool. If the pool for the chosen token pair doesn't exist, the notification message is displayed.
If you create a new pool, for SPOT PRICE, enter a spot price for the token pair that you consider fair. Otherwise, the displayed spot price can't be adjusted.
Storage feeWhen you add liquidity to a pool, the storage fee is charged. After closing the position, the fee is returned back.
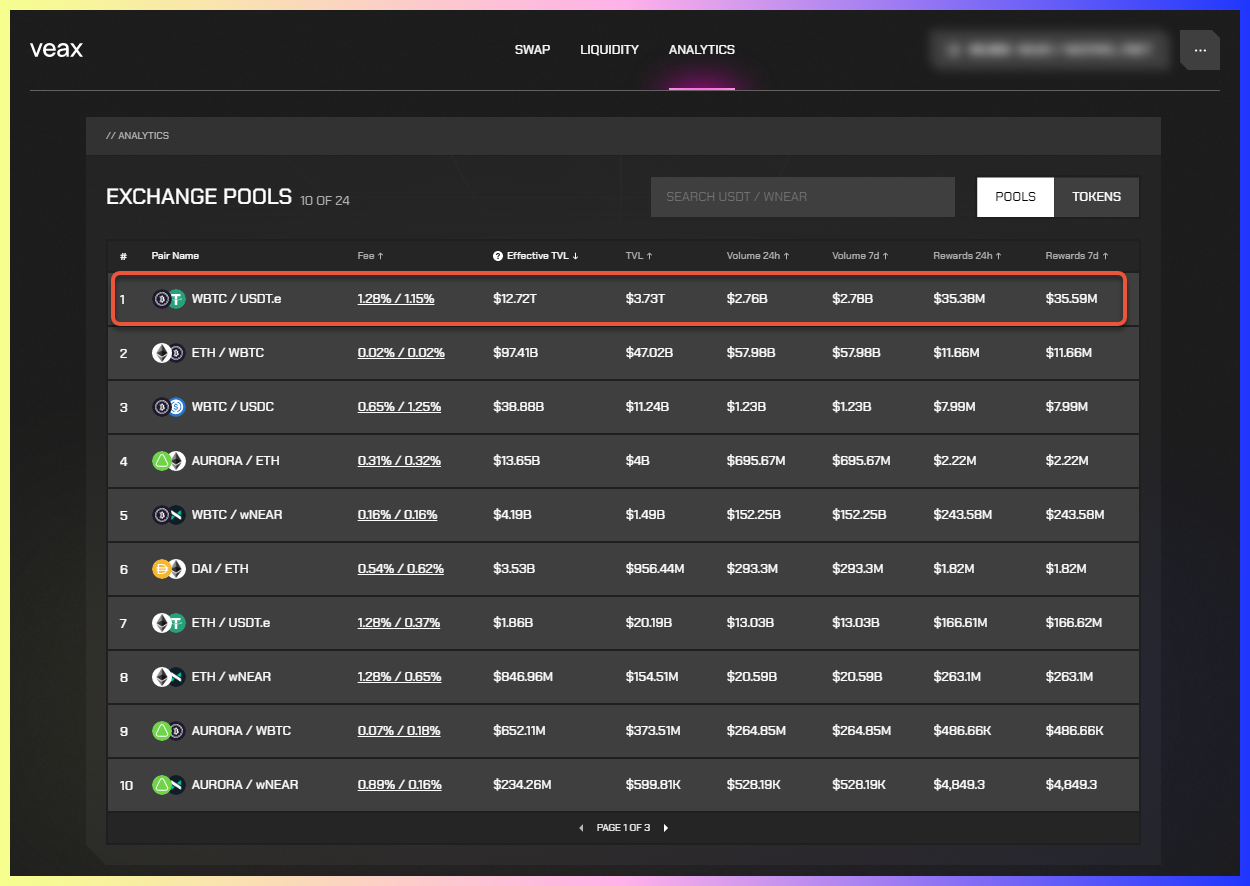
Through the //ANALYTICS window:
Go to ANALYTICS.
In the //ANALYTICS window that opens, choose and click a pool that you want to add your liquidity to.
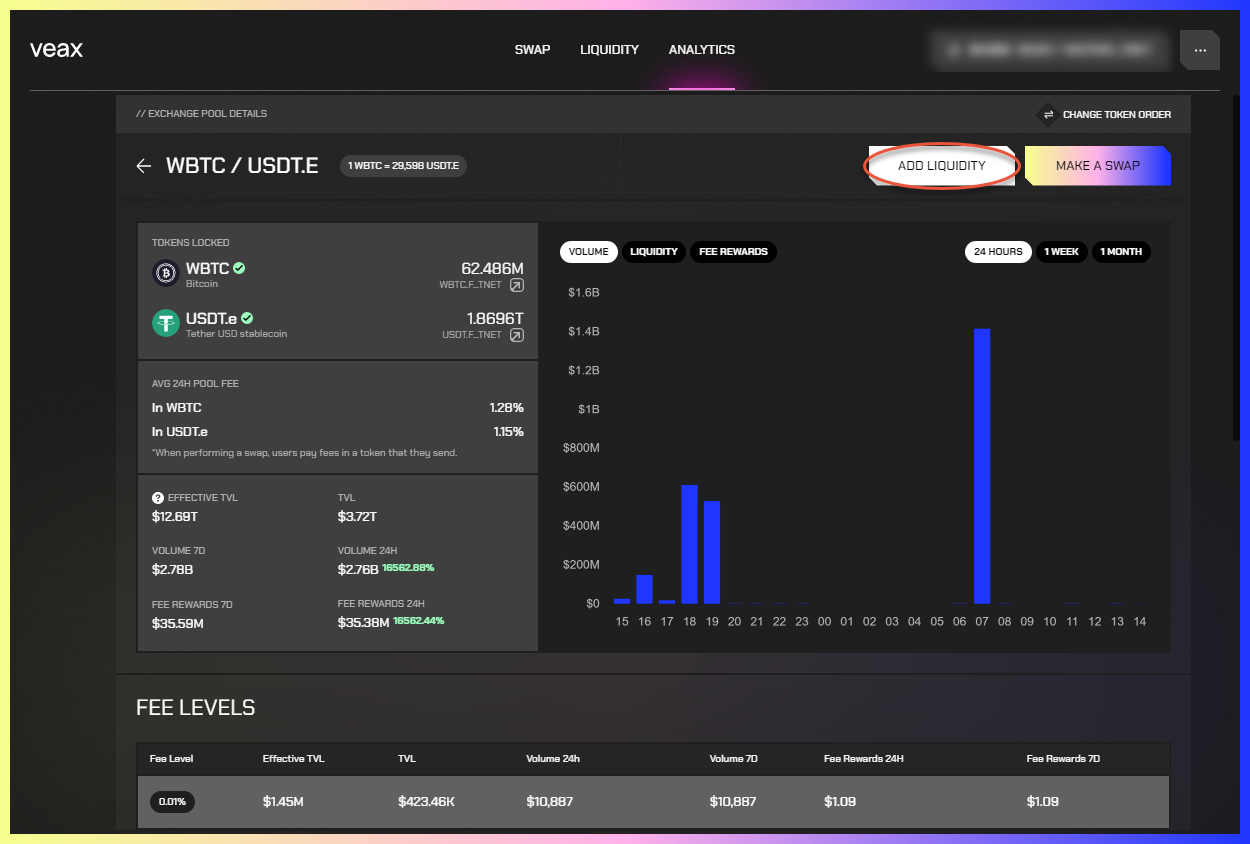
In the //EXCHANGE POOL DETAILS window that opens, click ADD LIQUIDITY.
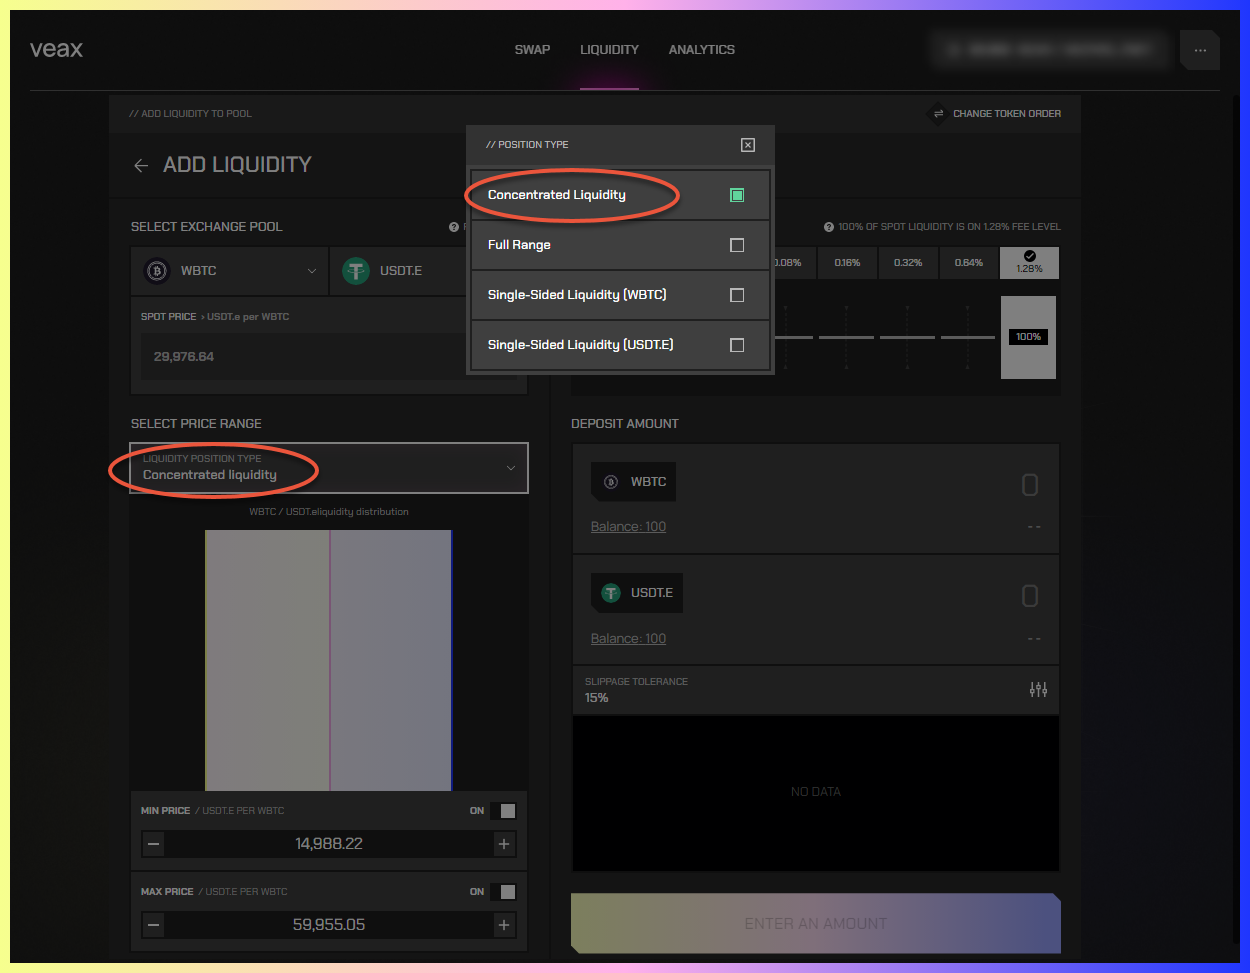
In //LIQUIDITY POSITION TYPE, select a liquidity position type.
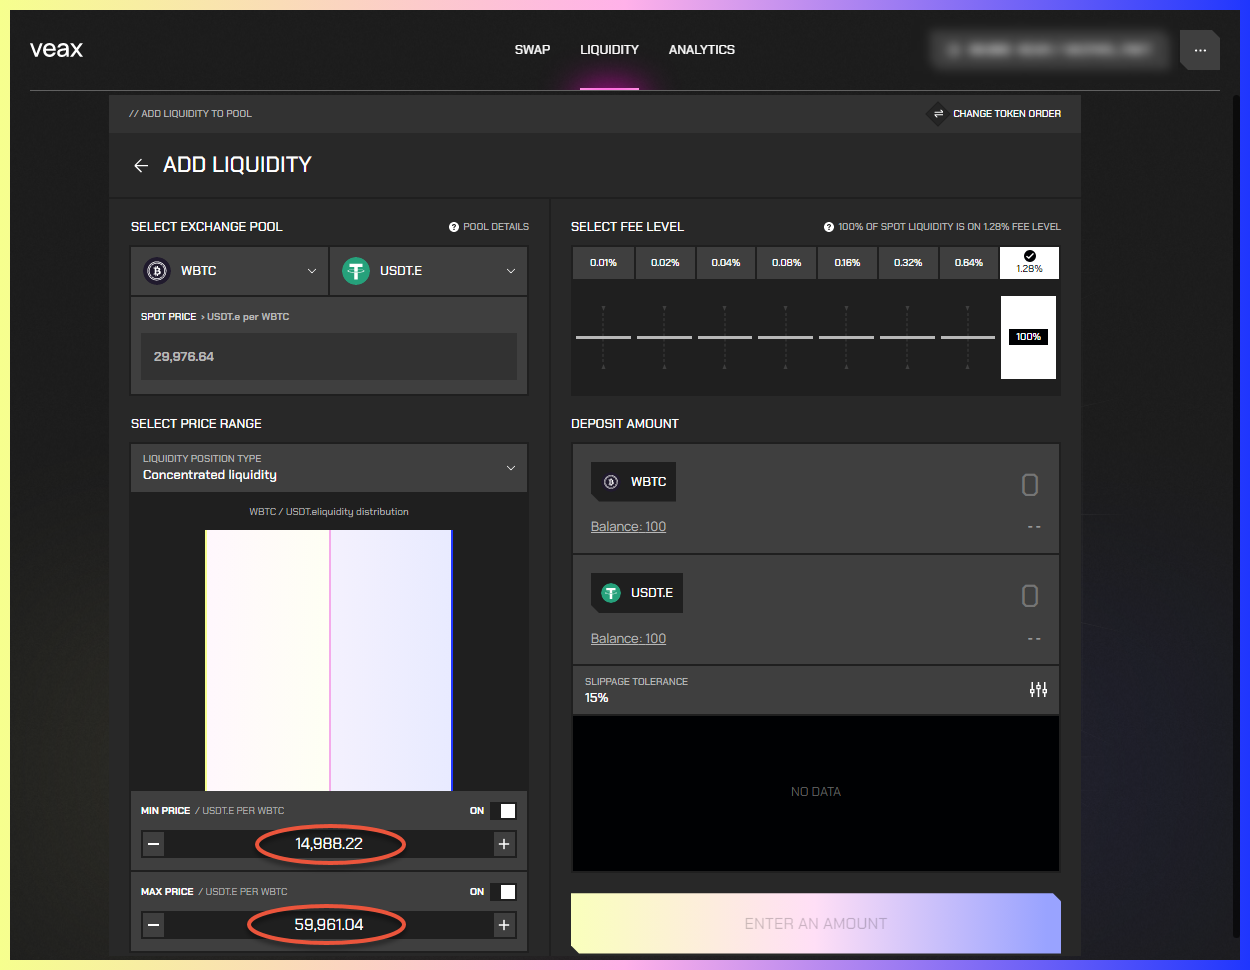
Optional: Set min and max token prices for your position:
For MIN PRICE, enter a minimum price. If turned off, the value is a very small number, almost 0.
For MAX PRICE, enter a maximum price. If turned off, the value is a very large number. We show it as infinity in the interface.
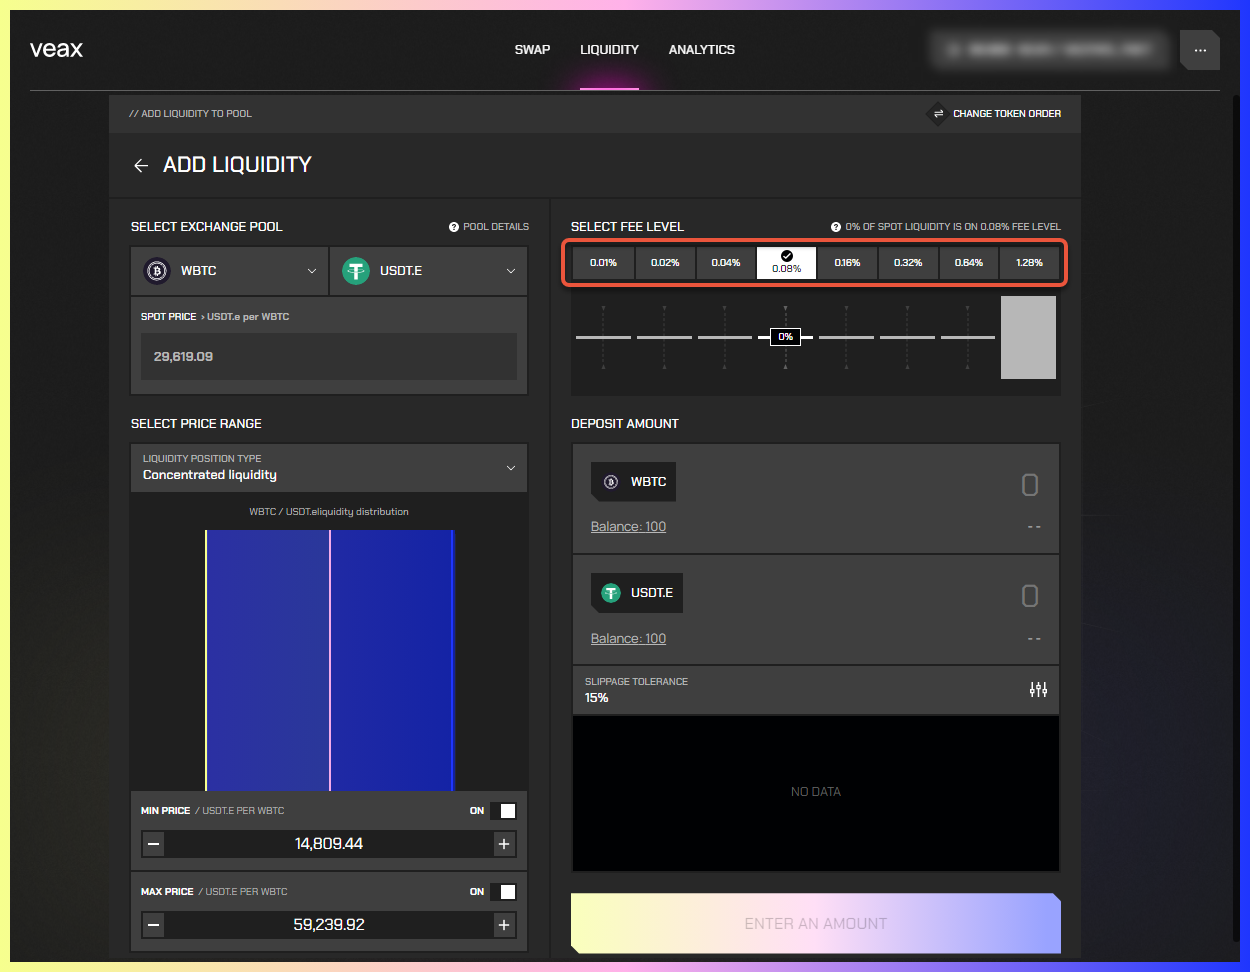
In the SELECT FEE LEVEL section, select a fee level you want to add your liquidity to.
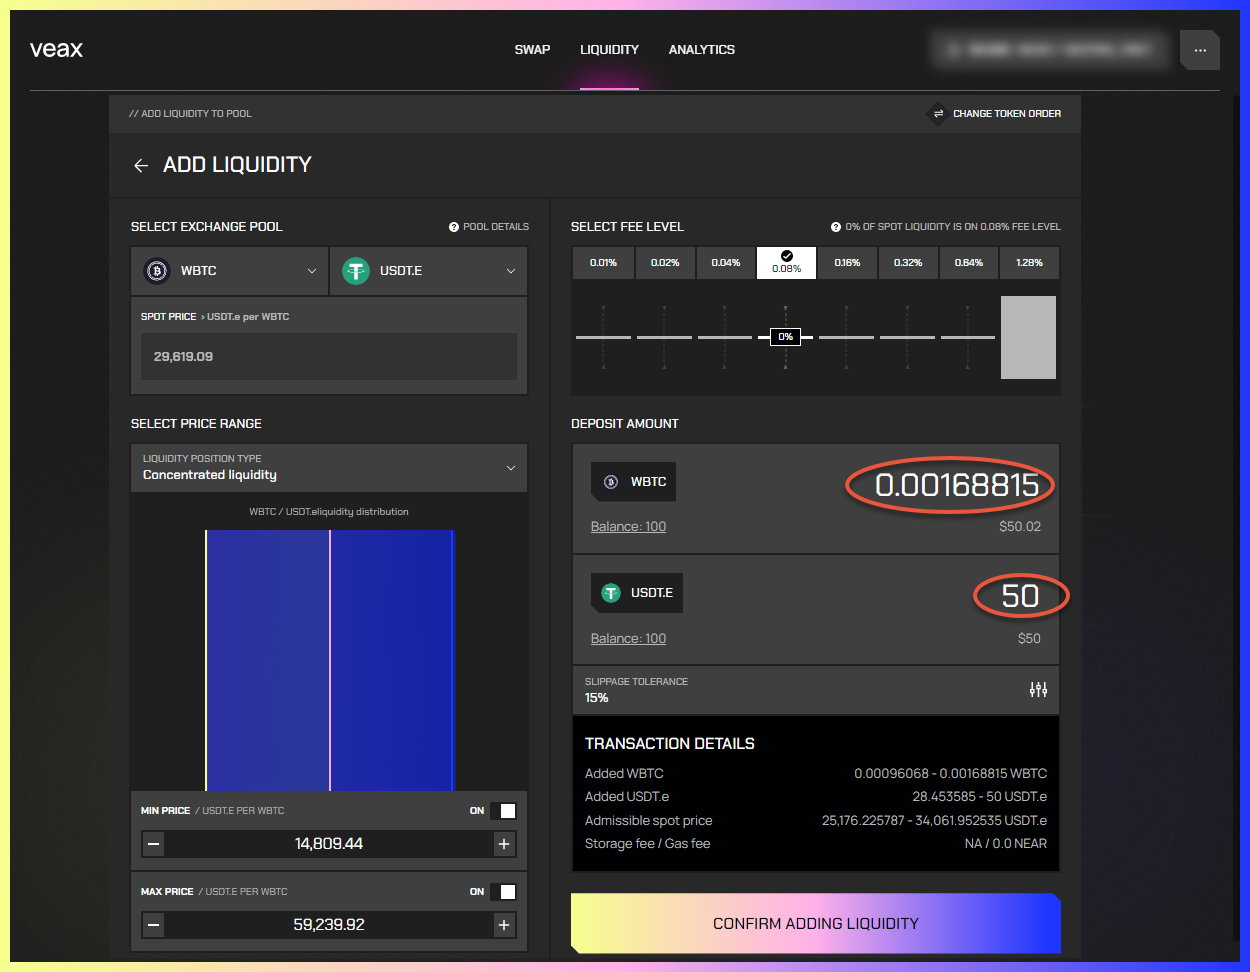
In the DEPOSIT AMOUNT section, enter the number of tokens you want to deposit to the pool. When you enter an amount for one token, it automatically adjusts for the other based on the spot price and the price range.
Optional: To set slippage tolerance, click the SLIPPAGE TOLERANCE setting. Note that the setting is not available for single-sided liquidity positions.
- Click CONFIRM ADDING LIQUIDITY. You are redirected to your wallet to approve the transaction.
- Approve the transaction. Your position is added to the pool, and you are redirected back to the //LIQUIDITY window, where you can view and manage your opened positions.

To check all the necessary information about your transaction, in TRANSACTION DETAILS, click VIEW ON EXPLORER.
References
| ATTRIBUTE | DESCRIPTION |
|---|---|
| LIQUIDITY POSITION TYPE | Lets you choose a liquidity position type:
|
| SPOT PRICE | Displays the current spot price for a chosen fee level, if available. If a liquidity pool doesn't exist, or it doesn't have liquidity, you need to enter a spot price manually. The entered value can be any number from 0 to infinity and is allowed to deviate from the current market price. When adding liquidity to an empty pool, you must enter the spot price, which remains the same for all fee levels until the first swap occurs in that pool. |
| SELECT FEE LEVEL | Lets you choose a fee level to supply liquidity on. The chart illustrates the spread of spot liquidity across all fee levels. The chart logic: there are eight fee levels, each represented by a bar. The spot liquidity is calculated at each fee level, the fee level with the greatest liquidity is found, and its percentage of the total spot liquidity is determined. This fee level's bar is the tallest (100% of the chart's height), and the other fee levels are proportionate to it based on their respective percentages. |
| MIN PRICE | Defines the minimum price for the position. The minimum price must always be less than the maximum price. The price range is divided into price ticks; if the entered value doesn't match any price tick, it is adjusted to the closest one. If you turn off the field, the default value is 0. |
| MAX PRICE | Defines the maximum price for the position. The maximum price must always be higher than the minimum price. The price range is divided into price ticks; if the entered value doesn't match any tick, it is adjusted to the closest one. If you turn off the field, the default value is infinity. |
| DEPOSIT AMOUNT | The section where you set the number of tokens you want to deposit to the pool. |
TRANSACTION DETAILS: Added TOKEN_1 | A range calculated based on the entered number of TOKEN_1 and slippage. TOKEN_1 stands for the first token you select in the SELECT EXCHANGE POOL section. |
TRANSACTION DETAILS: Added TOKEN_2 | A range calculated based on the entered number of TOKEN_2 and slippage. TOKEN_2 stands for the second token you select in the SELECT EXCHANGE POOL section. |
| Admissible spot price | Refers to the range of spot prices within which a desired position can be created, while still maintaining an acceptable level of deviation considering slippage tolerance. In the case of a single-sided liquidity position, there is no slippage tolerance, and the admissible spot price represents the range of spot prices within which the single-sided liquidity position can be created. If the spot price moves outside of this range, the single-sided liquidity position isn't created because it requires more than one token. |
| Storage fee/Gass fee | The amount of NEAR to be paid for storage and gas to create the position. |